As an Amazon Associate, we earn from qualifying purchases. Some links on this site are affiliate links at no extra cost to you. Our recommendations are based on thorough research and editorial judgment.

How to Clean an Air Fryer Heating Element Safely
Let your air fryer cool for at least 30 minutes after use, then unplug it completely. Flip the unit upside down on a soft cloth and wear protective gloves before touching anything near the heating element. Mix baking soda with dish soap and hot water into a paste, then gently work it onto stubborn buildup with a soft brush. Wipe away residue with a damp cloth, run the empty fryer at 200 degrees for 10 minutes to burn off soap, then inspect for that bright, shiny finish. Monthly cleanings keep everything running smoothly—but there’s definitely more to know about keeping this thing in peak condition.
Key Takeaways
- Unplug the air fryer and wait at least 30 minutes after use before cleaning to prevent electrical hazards and burns.
- Flip the unit upside down on a soft cloth, wear protective gloves, and use an inspection camera for hard-to-reach spots.
- Apply a baking soda and dish soap paste to stubborn buildup, let soak for five minutes, then gently brush away residue.
- Use only soft sponges and medium-bristle brushes; avoid steel wool and harsh scrubbers that damage the protective coating.
- Run the empty air fryer at 200 degrees for 10-20 minutes post-cleaning to eliminate soap residue and confirm cleanliness.
Cool and Unplug Before Touching Anything
Before you touch anything inside that air fryer, you’ve got to let it cool down completely—and I mean completely, not just “it doesn’t look hot anymore” cool. The heating element can seriously burn you, even if the exterior looks safe. That’s why the wait time matters so much here.
Unplug the unit from the wall. This is your safety check that prevents electrical hazards while you’re poking around inside. Don’t skip this step thinking you’ll be quick—you won’t be, and accidents happen fast.
Give your air fryer at least 30 minutes to cool after use. I know that’s annoying when you’re keen to clean, but trust me, burned hands aren’t worth the rush. Your future self will thank you for being patient.
Why Your Air Fryer Must Cool Completely

Waiting for complete cooling does two vital things. First, you’ll avoid burns that’ll make you regret rushing. Second, you’re protecting your warranty. Most manufacturers won’t honor claims from injuries caused by impatience, and some void coverage if you’ve tampered with a hot appliance.
Gather the Right Soft Cleaning Tools

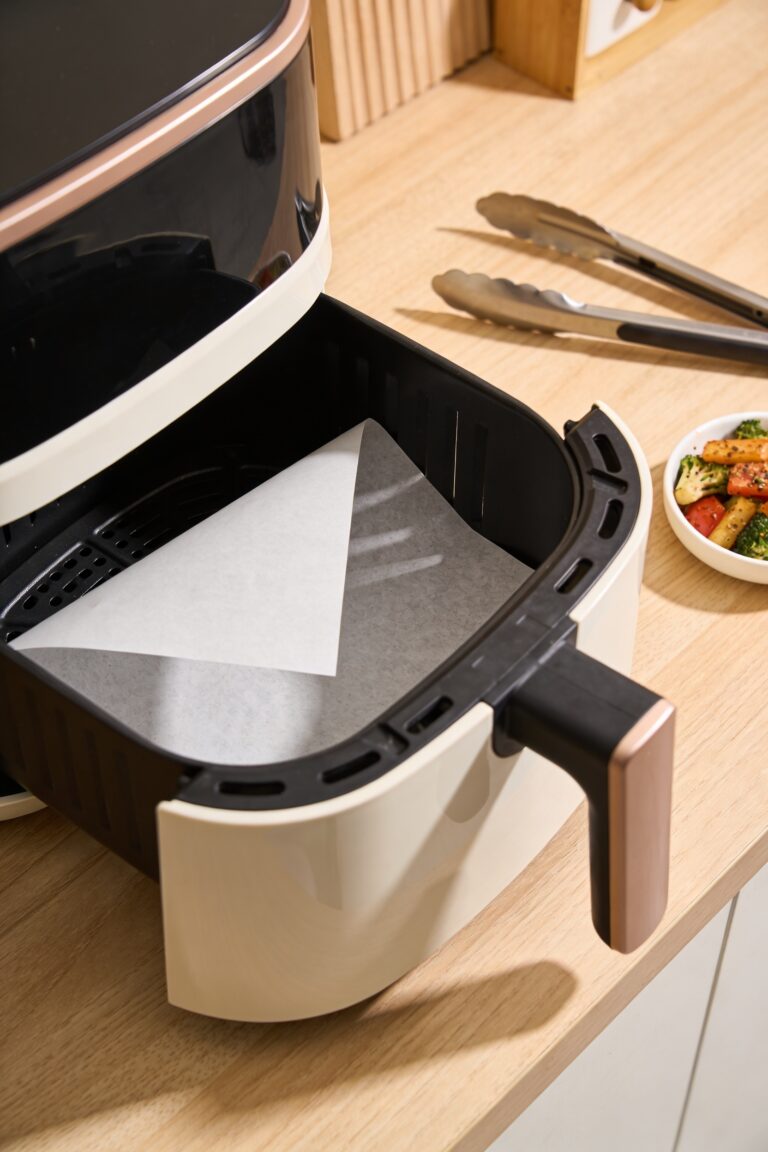
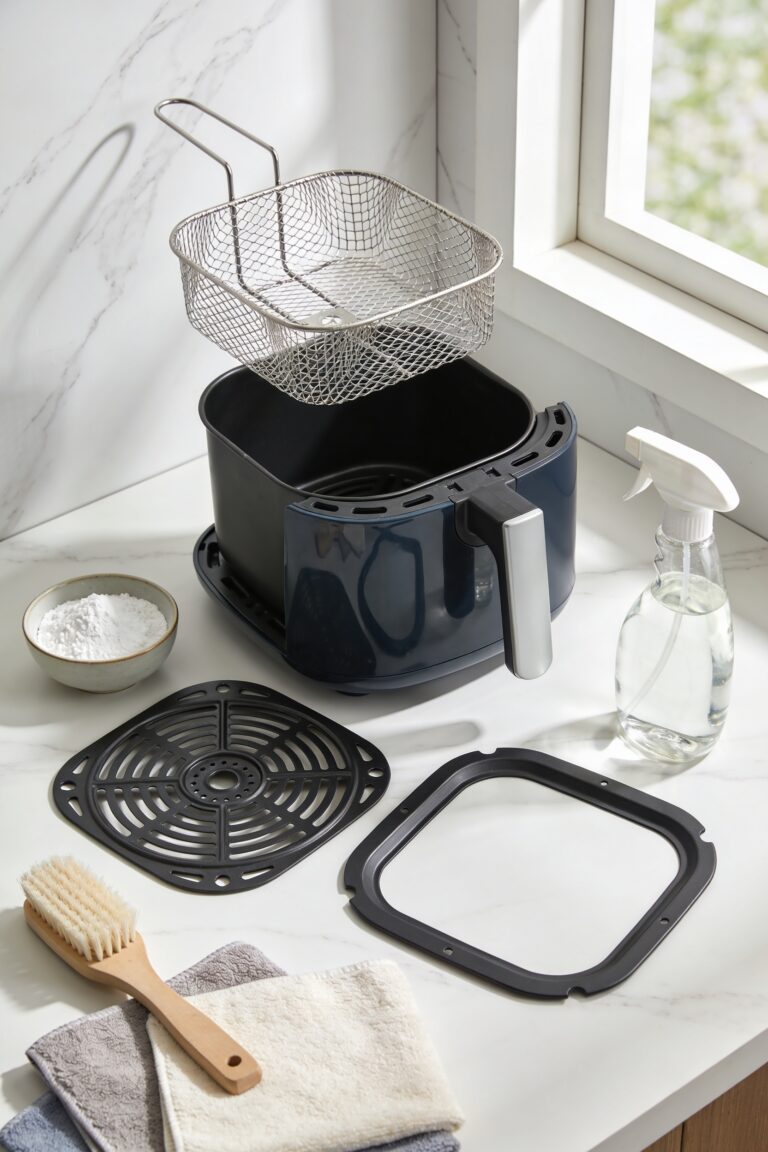
Now that your air fryer has cooled down completely, it’s time to gather your cleaning arsenal—and I promise this part matters more than you’d think. Skip the steel wool and hard brushes; they’ll wreck your heating element‘s protective coating faster than you can say “oops.” Instead, grab soft sponges, medium-bristle brushes, and microfiber cloths. These gentle tools do the heavy lifting without causing damage. I’d also recommend keeping eco-friendly sprays on hand—they’re effective and won’t leave nasty chemical residue in your food later. Stock some dish soap, baking soda, and wooden sticks for tight spots. The right tools make cleaning quick and painless, protecting your investment while keeping that heating element pristine.
Access the Heating Element Safely
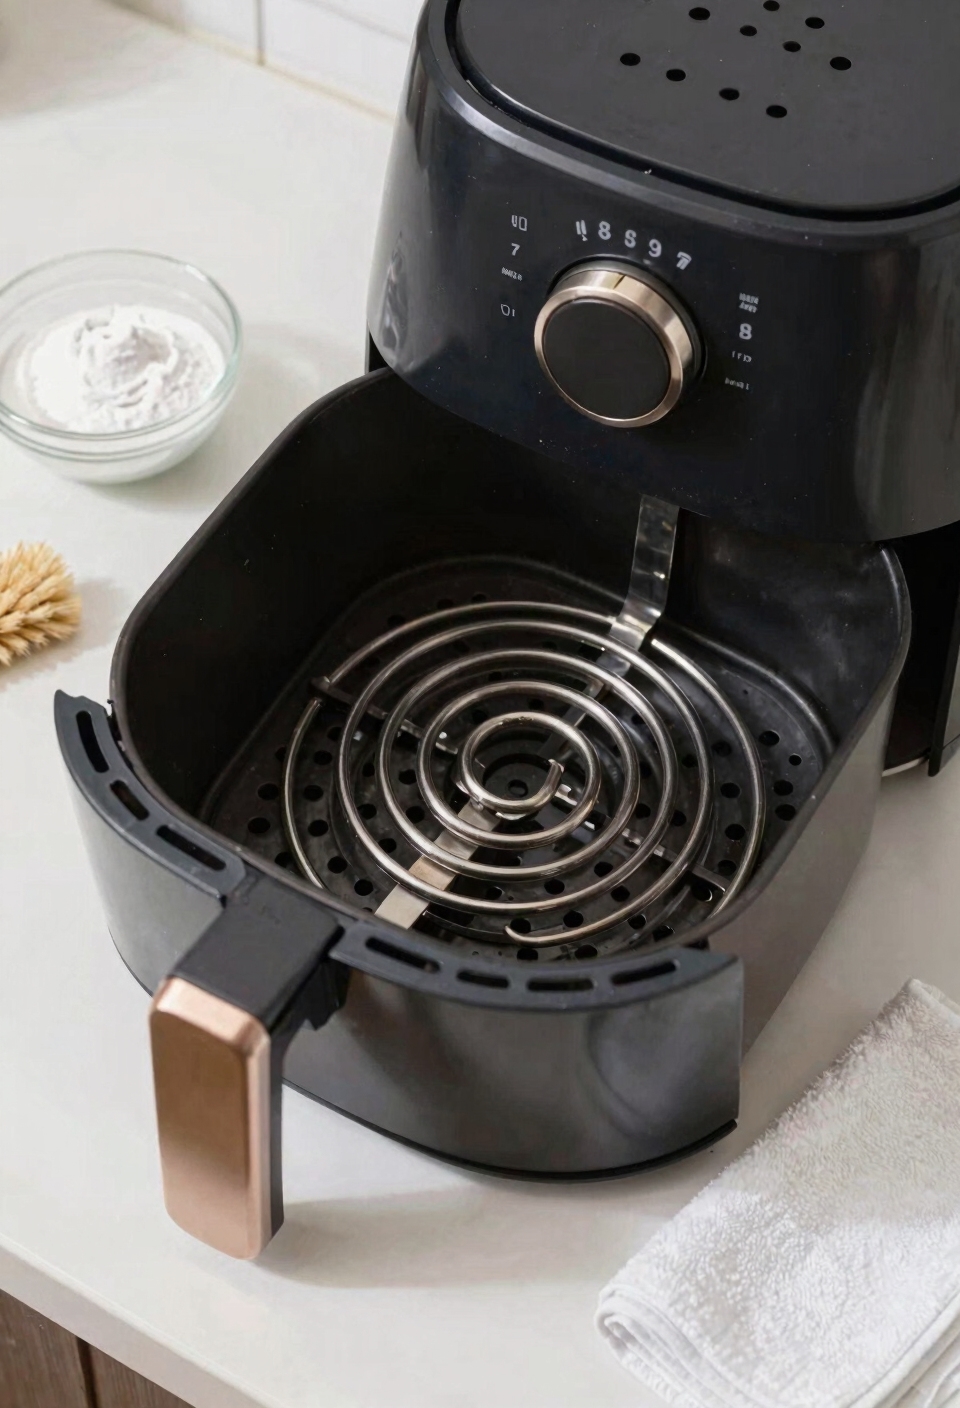
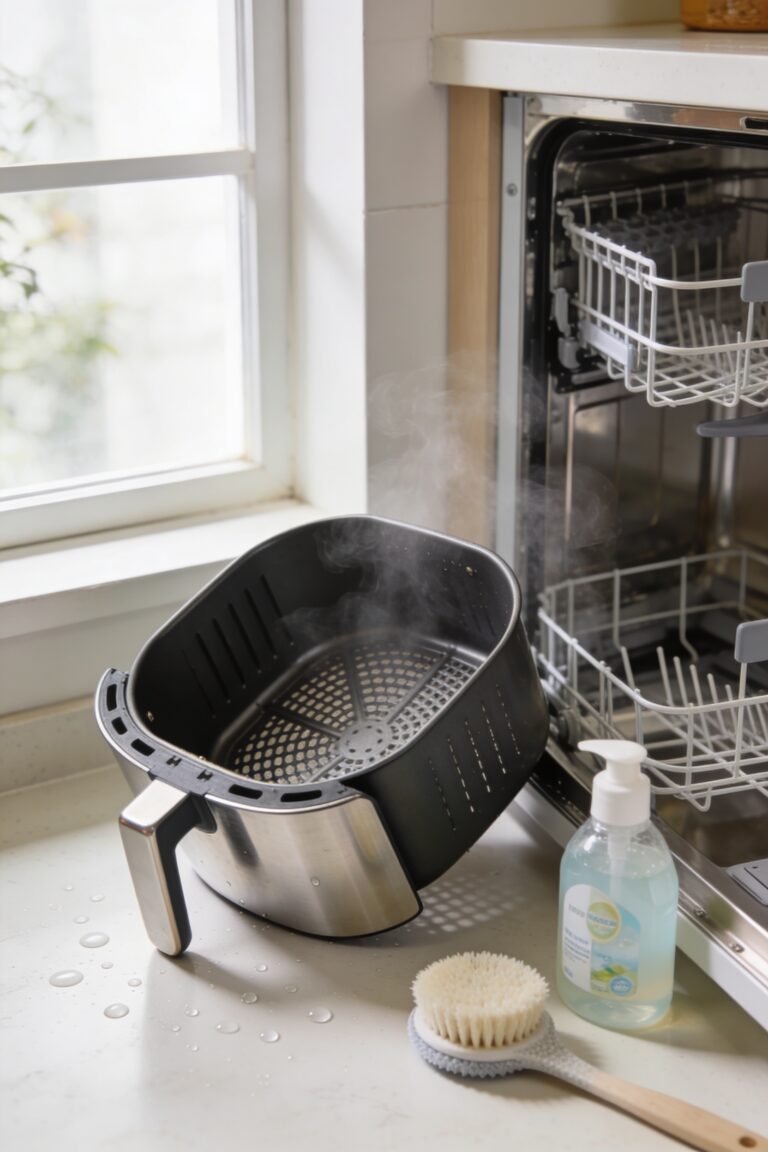
Once you’ve got your soft tools lined up, it’s time to flip your air fryer upside down—and yes, I recommend placing a soft cloth underneath to protect that exterior from scratches. Slip on your protective gloves before you start working around the heating element. Now here’s where patience pays off: use minimal water in this area. You’re aiming for damp, not dripping. An inspection camera can help you see those tricky spots behind the heating element without guessing. Take your time getting a good look at what you’re dealing with. This visual check keeps you from missing stubborn buildup and helps you work smarter. The goal’s safe access, not speed.
Mix and Apply Your Cleaning Solution

With your heating element exposed and ready for action, you’ll want to mix up a simple cleaning solution that actually works. I’ve found that combining baking soda with dish soap and hot water creates a paste that tackles stubborn buildup without damaging anything. Now, here’s the thing—you don’t need fancy products. This mixture loosens grease deposits surprisingly well. For spray application, dilute the solution with extra water so you can apply it evenly across the heating element. Soak paper towels in this mixture and press them onto stubborn spots for about five minutes. The baking soda does the heavy lifting while dish soap cuts through grease. It’s straightforward, effective, and won’t wreck your appliance.
Dissolve Grease Deposits Without Scratching the Coating
Let your cleaning solution sit on those grease deposits for a few minutes—this is where patience actually pays off. You’re fundamentally softening the buildup without any elbow grease required. Now, here’s the thing: once that baking soda and dish soap mixture has done its work, grab your soft-bristled brush and gently work away the loosened grime. I’d recommend wearing protective gloves during this step to keep your hands comfortable and protected from the cleaning agents. Use non-abrasive solvents only—never steel wool or harsh scrubbers that’ll damage that coating. A damp cloth becomes your best friend for wiping away what you’ve loosened. Work methodically. You’re not in a race here. Take your time, and you’ll have a spotless heating element without any scratches to show for it.
Burn Off All the Soap Residue
After you’ve wiped away the loosened grime and your heating element looks clean again, there’s one more step you can’t skip—getting rid of any soap residue left behind.
Now, here’s the thing: leftover soap residues can create annoying odors when you cook. I run my air fryer at 200 degrees for about 10 minutes to burn everything off. Some folks say 20 minutes does the job even better, and honestly, I don’t argue with extra caution.
Turn it on empty—no food inside. Let those residues fall into the pan below where you can wipe them away later. This odor elimination step takes patience, but it’s worth it. Your next meal will taste like food, not disappointment.
Test It: How to Confirm Cleanliness?
How do you know your heating element is actually clean? Look, I do a visual inspection first—I’m checking for any stubborn residue or discolored spots that might still be hanging around. If it looks bright and shiny, you’re probably in good shape. Now here’s where the smell test comes in handy. Fire up your air fryer without food and take a whiff. If you catch even a hint of soap or cleaning solution, run it another five minutes. A truly clean heating element smells neutral—nothing funky, nothing chemical. Trust your nose on this one. It won’t steer you wrong, and honestly, it’s the easiest quality check you’ve got.
Clean Your Heating Element Every Month (Or When Buildup Appears)
Now that you know your heating element is actually clean, here’s the thing—staying on top of maintenance keeps it that way. I’d recommend a monthly inspection to catch any buildup before it becomes a real problem. You don’t need to do a deep clean every time, just check what’s happening up there. If you see grease starting to accumulate, tackle it right away. Buildup prevention is way easier than dealing with heavy deposits later. A quick wipe-down with a damp cloth takes five minutes, seriously. Regular attention means your air fryer runs better, heats more evenly, and lasts longer. Trust me, spending ten minutes monthly beats spending an hour scrubbing later.
Diagnose Why Your Heating Element Isn’t Working Properly
When your air fryer stops heating up like it used to, don’t panic—there’s usually a pretty simple culprit hiding somewhere. First, check if you’ve got a power surge issue by plugging the unit into a different outlet. Sometimes that’s all it takes. If that doesn’t work, look for grease buildup around your heating element—we’ve covered that already, and it’s probably the most common problem you’ll face. Now, if everything looks clean and you’re still getting nothing, you might be dealing with a sensor failure. That’s trickier because sensors aren’t something you can clean away. You’ll likely need professional help or replacement at that point. But honestly, nine times out of ten, it’s just grease or a power glitch.
Frequently Asked Questions
Can I Use Boiling Water Directly Inside the Air Fryer for Faster Cleaning?
No, I’d strongly advise against it. Boiling water poses significant boiling risks inside your air fryer and can cause element damage to the heating element coating. I recommend using soft sponges with hot water instead.
What Should I Place Under the Air Fryer When Turning It Upside Down?
I’ll place a soft cloth under my air fryer when turning it upside down. Did you know that 73% of appliance damage comes from scratches? I recommend using towel padding or a silicone mat to protect the exterior effectively.
How Long Can I Soak the Basket and Pan With Dish Soap and Hot Water?
I’d recommend soaking your basket and pan for 30 minutes with dish soap and hot water. This soak duration effectively softens grease deposits. You’ll want to make certain proper soap concentration—enough to cut through buildup without overwhelming the water.
Should I Remove the Heating Element During the Cleaning Process?
Don’t bite off more than you can chew—I’d advise against removing the heating element. You’ll face reassembly difficulties. Instead, I recommend turning precautions like placing soft cloths underneath and performing element inspection while the unit’s positioned upside down.
Will Regular Cleaning Restore My Air Fryer to Brand-New Condition?
I’ll be honest—regular cleaning won’t restore your air fryer to brand-new condition. While it’ll keep performance solid, restoration limits are real. Check your warranty considerations before expecting pristine results.
Conclusion
Look, keeping your air fryer’s heating element clean isn’t rocket science—it’s just a matter of letting it cool, grabbing the right tools, and giving it some TLC monthly. You’ll hit the ground running once you nail this routine. A spotless element means faster cooking, better results, and an air fryer that’ll stick with you for years. Don’t put all your eggs in one basket by ignoring maintenance. Your future self will thank you.